How High Should a Floating Vanity Be With an Undermount Sink?
A floating vanity can feel wrong by an inch before you can explain why: your wrists meet the basin awkwardly, the mirror sits too low, or the open floor gap looks pinched. For an adult bathroom with an undermount or integrated sink, we would start by mocking up a finished working surface at 34 to 36 inches above the finished floor. That is a comfort test, not a wall-mount instruction. Set the surface your hands actually meet first, then work backward through the sink, countertop, cabinet, mounting hardware, plumbing, and wall support before the wall closes.
The BathGem's Blueprint
- Decide the finished working height first. For an undermount or integrated sink, test the counter or deck surface. For a vessel sink, test the rim.
- Choose the actual sink and top before the cabinet gets a mount mark. A 5-inch vessel changes the vertical stack by 5 inches; a 3 cm top adds about 1.18 inches.
- Use the model's installation drawing to place the rail, cleat, or cabinet. A listed product height is not automatically the distance from the finished floor to the wall hardware.
- Coordinate studs or required reinforcement, drain, supplies, mirror, faucet, and receptacles on one wall elevation before tile makes every correction harder.
Floating Vanity Height Starts With the Finished Surface

Several current height guides cluster around 32 to 36 inches from finished floor to countertop, with 34 to 36 inches repeatedly suggested for adult use, which is useful for orientation but weak as installation advice if sink geometry and the actual mounting system are skipped. A floating bathroom vanity gives you control over height, so you also have to account for the top, sink, cabinet box, hardware, and the people using it. The range isn't the problem; treating it as a mount mark is.
Counter height and cabinet height are different measurements: with an undermount sink, the countertop is usually the working reference because the basin drops below it; with a vessel sink, the rim rises above the counter and becomes the more useful comfort check. This distinction matters because the cabinet may move several inches while the working surface stays exactly where you want it. If you start by choosing a pleasing floor gap, you can end up solving the least important dimension first.
| Sink setup | Height to judge first | What moves the cabinet |
|---|---|---|
| Undermount | Finished countertop | Top thickness, true cabinet-box height, and mounting offset |
| Integrated sink | Finished deck or rim surface | Integrated-top profile and mounting system |
| Vessel sink | Top of the vessel rim | Bowl height above the counter, top thickness, and faucet geometry |
How High Should a Floating Vanity Be With an Undermount Sink?

For an adult bathroom with an undermount sink, 34 to 36 inches at the finished countertop is the range we would test first. Tape lines on the wall at 34 inches and 36 inches, then stand at the sink position and mimic washing your hands, shaving, or brushing your teeth. Check your shoulders and the amount you bend at the waist instead of judging the tape from the doorway. Two people who share the room should both try the mock-up before anyone marks the wall hardware.
Countertop thickness belongs in the same calculation: a 3 cm top is about 1.18 inches thick, so a 35-inch finished counter does not mean any part of the cabinet should automatically be mounted at 35 inches. The installer needs the desired finished height plus the exact top thickness, cabinet-box height, and the rail or cleat offset shown on the installation drawing. Freeze the top specification before the rail is marked because a late stone change alters the surface your hands meet even when the cabinet never moves.
We would also mock up depth at the same time. A comfortable vertical height can still feel awkward if a deep bowl, short faucet reach, or thick front edge makes you lean farther forward than expected. Height is only ergonomic when the reach works with it, a detail that is easy to miss when the vanity and faucet are chosen in different weeks.
Vessel Sink Height Changes the Math

A vessel sink is where generic vanity-height advice breaks fastest: put a 5-inch-high vessel on a 36-inch counter and the rim lands around 41 inches above the floor, while that same 5-inch bowl on a 30-inch counter lands around 35 inches before you account for how the bowl actually seats. We would choose the vessel first, read its dimensional drawing, and solve the cabinet position from the desired rim height. Do not add a vessel to a standard-height counter and assume the result will feel like an undermount setup.
Owner reports show why one vessel number does not travel well from bathroom to bathroom: across several Houzz vessel-sink discussions, owners reported or suggested rim heights from about 32 inches to 41 inches, while another owner reported needing a stool for a vessel installed on a standard-height vanity. Those are owner reports, not performance standards, and the disagreement is useful because it exposes the variables: user height, bowl height, counter height, faucet reach, and how the sink is used. Use the reports as a reason to mock up your own assembly, not as a reason to copy somebody else's dimension.
A quick vessel-height check
- Target rim: 35 inches above finished floor.
- Bowl height above counter: 5 inches.
- Starting counter height: about 30 inches, then adjust for the actual sink seating detail and countertop assembly.
Put the faucet into that same mock-up because a tall vessel faucet with short reach can make you lean farther forward, while a wall-mounted faucet fixes the spout in a different plane before the vanity is hung. The mechanism is simple: the farther the water landing point sits from your natural hand position, the more you reach across the bowl. A comfortable rim height can still feel awkward if the faucet geometry is wrong.
The Gap Under the Cabinet Is an Outcome, Not a Target

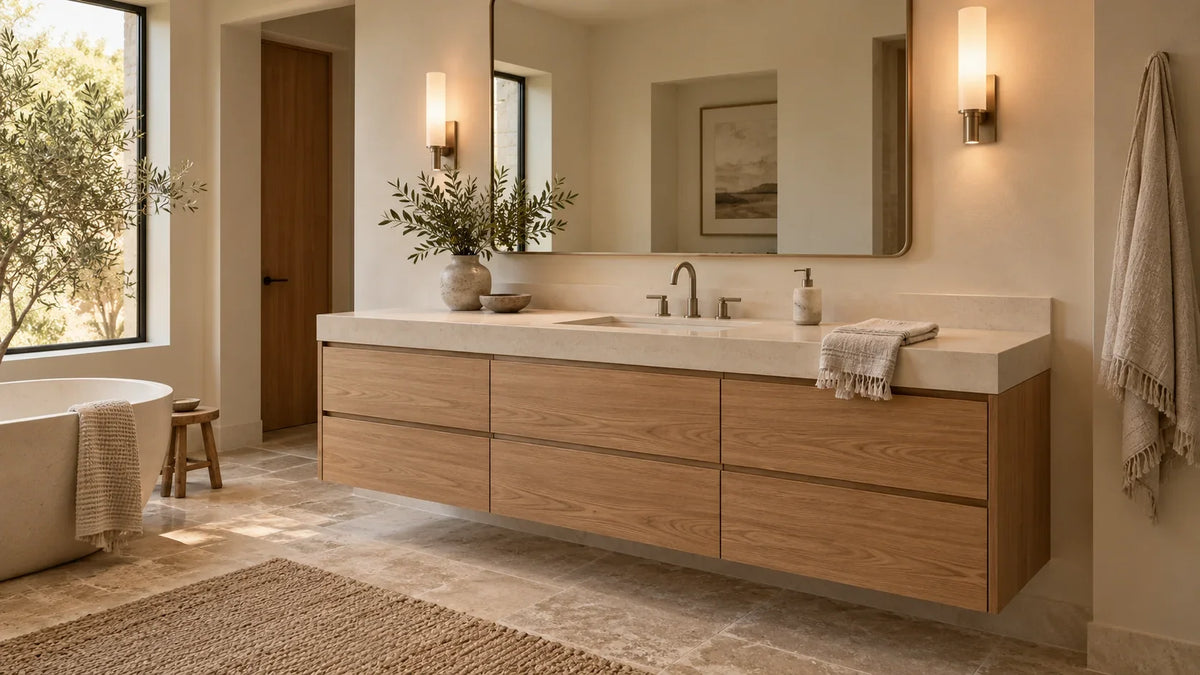
The open floor is the visual signature of a wall-hung vanity, which makes it tempting to start with a preferred gap. We would not. A shorter cabinet can leave a generous reveal at the same finished counter height where a taller cabinet leaves a narrow shadow line. Let the working surface and the actual cabinet determine the reveal after the functional dimensions are settled. Finish changes how that reveal reads, too: a narrow gap under one of our black vanities looks like a deliberate shadow, while the same gap under a white bathroom vanity tends to fade into a light floor.
Current BathGems product pages show why listed dimensions need context. The 30-inch Laurent in Light Natural Oak is listed at 29.9 inches wide, 23 inches deep, and 33 inches high; its page says it is dual-mounted and can be installed freestanding or floating, with 3 cm eased-edge top options. The 36-inch Chicago in Smokey Celadon is listed at 35.88 inches wide, 23.25 inches deep, and 32.63 inches high; its page also says it is dual-mounted, identifies solid kiln-dried poplar construction, and offers 3 cm tops. Those are useful catalog facts, but they do not tell you to place the wall hardware 33 inches or 32.63 inches above the floor.
A dual-mount design can change its lower profile when legs or a freestanding base are omitted, and the mounting cleat has its own offset from the cabinet edge, which is why the model's assembly drawing outranks the overall-height line on a product page. The gap also makes floor slope more visible because the lower cabinet edge creates a long horizontal reference against the tile. In an older bathroom, check that relationship before treating an exact floor reveal as a design requirement.
Explore our Floating Bathroom Vanities

72" Double Sink Bathroom Vanity with Top in Chestnut - James Martin Marcello


24" Chianti Single Cabinet in Glossy White in Champagne Brass by James Martin Vanities


Floating Vanity Installation Starts Before Tile

A floating cabinet turns the wall into part of the furniture. The load travels from the sink and top into the cabinet, through its mounting hardware, and into the wall structure, so the support plan is part of the height plan. James Martin's one-year limited warranty says it does not cover damage due to improper installation. Wyndham Collection's two-year limited warranty says it does not protect against malfunction or other failure caused by improper installation, and Wyndham recommends professional installation even though its warranty says that is not required.
Height decisions become harder to reverse once the wall is finished because moving a wall-hung cabinet after tile can change anchor locations, drain alignment, backsplash relationships, mirror position, and the visible floor gap at the same time. We recommend one coordinated elevation showing finished floor, working surface, cabinet box, mounting hardware, sink, drain, supplies, faucet, mirror, sconces, and receptacles. The drawing does not need to be pretty; it needs to stop five trades from solving the same 12 inches of wall independently.
Wall Support Is a Framing Decision
James Martin's wall-mount installation guidance says the hardware needs to be attached to studs in the wall and recommends a professional for installation, while the exact vanity instructions still control because rail layouts, fasteners, wall construction, and cabinet weight vary by model. If the manufacturer calls for specific reinforcement, anchors, or fastener locations, build the wall around those requirements instead of substituting a generic rule. Solve the support while framing is open whenever the project allows it.
Owner discussions point to the same timing problem without becoming a structural specification: across at least four independent Reddit DIY and renovation threads, posters described brackets that missed studs, walls reopened for blocking, or support added after a floating vanity had already been positioned. Those reports do not prove one reinforcement method is correct for every vanity. They do show why stud and hardware locations belong on the plan before drywall and tile hide the framing.
Plumbing Has to Respect the Drawer Layout
A drain placed through the middle of a full-depth drawer can force a cutout, erase storage, or pressure the installer to move the cabinet from the height you chose, so before rough-in, draw the trap, shutoffs, supply lines, cabinet back, and full drawer travel on the same elevation. The mechanism is physical rather than cosmetic: pipes occupy the same volume the drawer needs to move through. A balanced front elevation can hide a cabinet that barely opens inside.
Do not copy a generic drain height from another bathroom and assume it will fit. Sink depth, waste fitting, trap geometry, cabinet construction, and drawer layout all change where the piping can pass. Give the plumber the actual sink and vanity documents early enough to coordinate a serviceable route; if preserving the rough-in destroys the storage you chose the vanity for, change the model before you change the finished working height.
Mirror, Faucet, and Receptacle Heights Move With the Vanity
Raise the working surface and the useful wall above it gets shorter, so a taller counter can crowd a low mirror, compress the backsplash zone, move sconces upward, or conflict with a wall-mounted faucet that was roughed in before the vanity arrived. Homeowners often choose these pieces in separate orders and discover during installation that three sensible dimensions want the same strip of wall. Put them on one elevation before anyone drills tile.
On projects in the United States, electrical placement has a real threshold. The current 2026 edition of NFPA 70, National Electrical Code, Section 210.52(D)(1), requires at least one bathroom receptacle within 3 feet of the outside edge of each sink; Section 210.52(D)(2) says the receptacle cannot be more than 12 inches below the top of the sink or sink countertop. Your locally adopted code and inspector control the project, so confirm the edition and local amendments before rough-in. Vanity height can therefore change electrical coordination even when the cabinet width stays the same.
Accessibility Uses a Different Height Rule

An accessible lavatory should not borrow the same 34-to-36-inch comfort range used for a typical adult bathroom. Under the 2010 ADA Standards for Accessible Design, Section 606.3 sets the front of the higher of the rim or counter surface at 34 inches (865 mm) maximum above the finished floor or ground for covered lavatories and sinks. That 34-inch maximum is a compliance threshold, not a universal residential recommendation. The ADA Standards do not automatically govern every private residential bathroom.
Height is only one part of an accessible lavatory because clear floor space, knee and toe clearance, reach ranges, faucet operation, mirror placement, and protection from exposed pipes can all change whether a design works and whether it meets the applicable rules. A floating cabinet may help create open space, but drawers, aprons, traps, and decorative panels can consume that space quickly. If accessibility is in the brief, design to the full applicable standard and local requirements rather than borrowing the 34-inch number alone.
The Floating Vanity Disadvantages Height Can Magnify

A wall-mounted cabinet is less forgiving of late changes because structure, plumbing, finished height, drawer geometry, mirror placement, and the visible floor line meet in one installation, while the open underside can also expose piping or make a sloped floor easier to notice than a freestanding cabinet would. Height makes those tradeoffs louder because moving the cabinet to rescue one conflict can create another. We would walk away from a floating layout if the wall cannot be prepared for the specified mounting system or if the plumbing cannot be coordinated without gutting the storage you bought the vanity for.
Vessel sinks add another reason to be strict. A high rim can turn a visually light cabinet into an awkward daily reach, while lowering the cabinet to correct the rim may shrink the floor gap or collide with the drain. The smart move is to reject the combination that forces the room to compromise three systems at once and choose another sink or cabinet while those changes are still product decisions rather than tile repairs.
Measure These Before You Mount It

The pre-install measurement list
- Finished floor level, not subfloor.
- Target finished counter height or vessel rim height.
- Countertop thickness and vessel bowl height above the counter, if applicable.
- Actual wall-hung cabinet-box height, excluding any removable freestanding base or legs where the model is designed that way.
- Mounting rail or cleat offset from the cabinet top or bottom.
- Drain, supplies, shutoffs, trap, and full drawer travel.
- Stud locations plus manufacturer-required reinforcement and fastener positions.
- Backsplash, mirror, faucet, sconce, and receptacle positions.
- Door swing and standing clearance in front of the vanity.
Mark the important heights on the actual wall with painter's tape, then place a box, folding table, or scrap panel at the proposed working level and use the mock-up for a few minutes instead of standing in the doorway and admiring the proportion. Bend over the bowl position, reach toward the faucet, open an imaginary drawer, and look at where the mirror would begin. A rendering can show composition, but your body catches the inch that a dimension schedule can miss.
Then hand the same elevation to the cabinet installer, plumber, electrician, tile setter, and anyone locating the mirror or sconces; the point is not to make every trade responsible for every line. It is to give each person the same finished-floor reference and the same target surface. An expensive height mistake is often a coordination mistake wearing a measurement label.
Where We Would Land

For an adult bathroom with an undermount or integrated sink, we would test a 34-to-36-inch finished surface first and move it only after the actual users try the mock-up. With a vessel sink, choose the rim height first and work downward through the bowl and counter instead of stacking the vessel on a standard-height vanity. Once that number is settled, let the cabinet and its installation drawing determine the wall hardware and the floor reveal. If you are still deciding whether the wall-hung format is worth the extra coordination, our guide to what a floating vanity is and whether it fits your bathroom is the useful next read.
Frequently Asked Questions

Todd Harmon
Vanity height is one of those choices you feel more than you see because sink geometry, wall support, and the floor reveal all meet in the same few inches. Todd's point of view here is to settle those dimensions as one system before the cabinet goes on the wall. With over two decades in e-commerce and product curation, Todd built BathGems on a simple idea: a bathroom should feel as collected and considered as the rest of the home. He sources every vanity and fixture in the BathGems catalog the way a designer pulls samples, weighing material, proportion, finish quality, and how a piece actually lives in a real room over time.